|
JOIN OUR MAILING LIST |
In the next exercise we are going to insert an image in the content editor of the about us. (The content editor is what we call little box that looks like MS Word and is found all over your website.)
First click on website content and then about us. You should see the content editor of the about us.
Then click on the icon that looks like a small photo. When you hover over that icon you will see a scree tip which says Insert / Edit image
Tip : While you are busy hover over a few other icons and see their screen tips.
See the image which display where the Insert Image Icon is located.
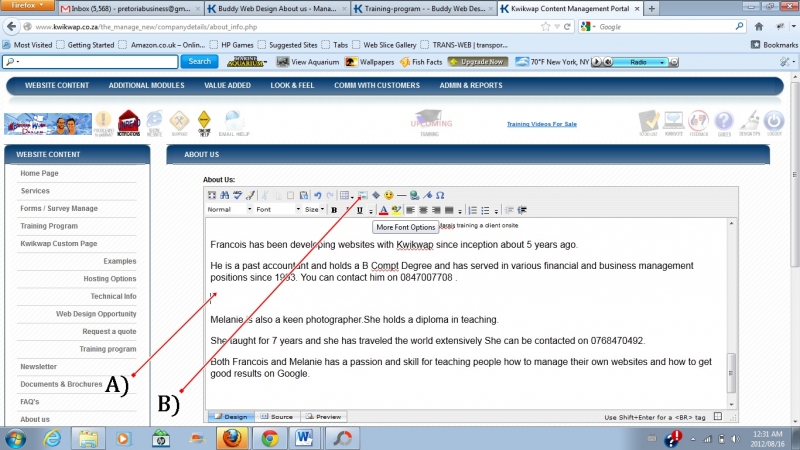
a.) First click your cursor inside the content editor where you want to place a photograph
b.) Click on the icon which says Insert / Edit Image
The following screen will pop up :
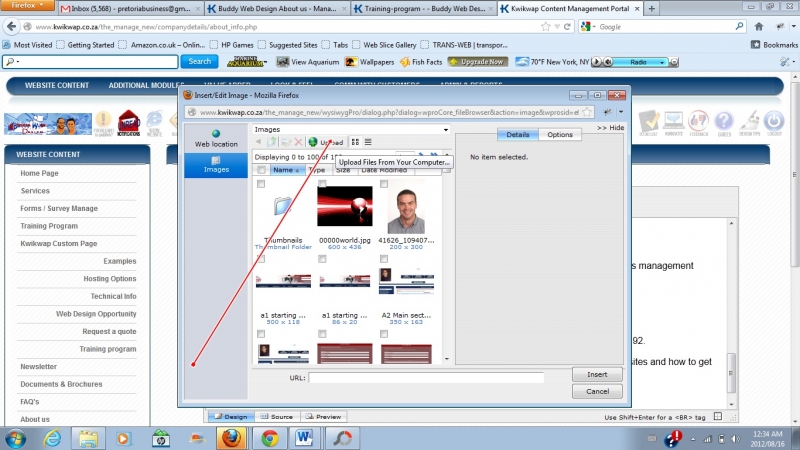
Please note that you will first have to upload photos. See image above. As you upload photos the photos will remain available in your photo library to reuse inside your website.
Click op upload as indicated in above image. The following screen will appear:
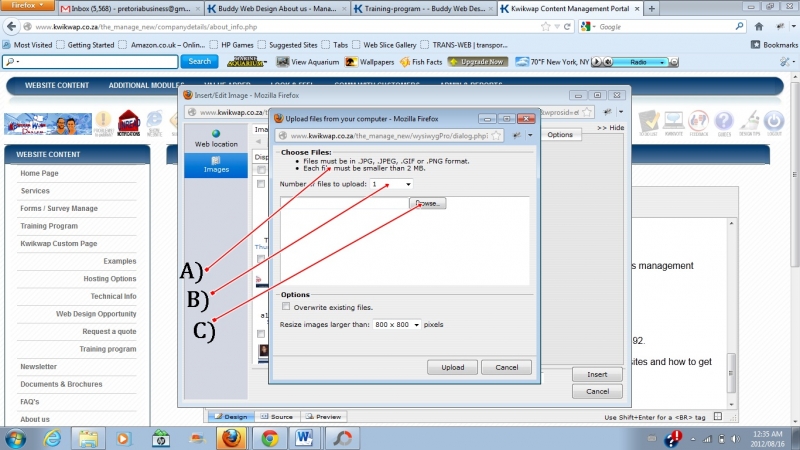
With reference to above image:
A.) Please note the required format which is allowed. Please note the size limitation . (Too large images will slow your website down.) 100kb is fine.
B.) You can upload up to 20 photos at a time which can save you time
C.) You must click on browse to select the photos from your computer to upload.
Once that is done the following screen will appear:
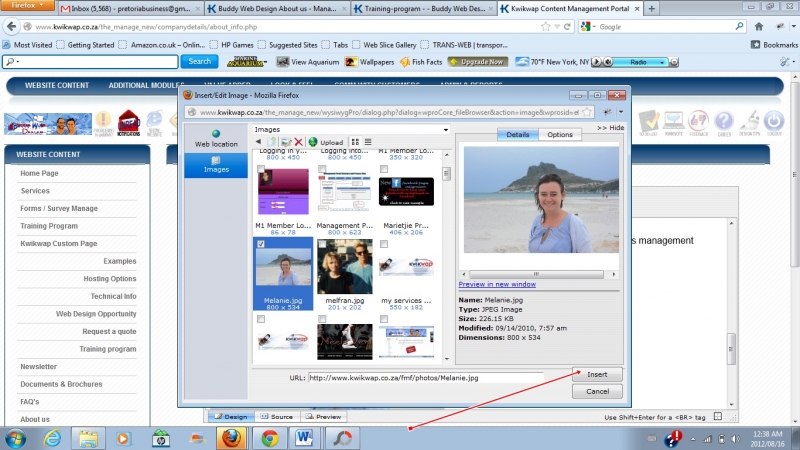
You can now insert the image.Click on insert.
You can now the update about us, publish all changes and refresh your website. (As discussed in previous exercises).
Congratulations you are well on your way and hopefully getting bored at this stage.
Please be honest in the survey that follows as we can know how to assist you in the correct manner and how to adjust our online training program to best help our students. Please be honest.
